How to Repair Dry Rot in Wood: Step-by-Step Guide for Homeowners
Dry rot in wood is not just an ugly stain. It is a fungus that eats the wood fibers, weakens the structure, and can turn a balcony, deck, stair, or railing into a safety hazard if you ignore it. In California, dry rot is one of the most common issues found during balcony and exterior inspections.
What is dry rot in wood?
Dry rot is a type of wood decay caused by a fungus that feeds on moisture and wood. It often starts inside the wood and moves outward, which is why the surface may look fine while the inside is already soft or crumbling.
Common signs include:
Soft, spongy, or crumbling wood
Darkened, cracked, or shrunken wood
Orange or brown dust or spores
Musty smell around the affected area
If you can easily push a screwdriver into the wood, it is usually more than simple surface damage and needs repair or replacement.
Is it safe to repair dry rot yourself?
Yes, for small, non-structural parts like trim, window frames, siding edges, or small sections of a railing.
No, for structural or load-bearing parts like balcony joists, deck beams, stair stringers, or exterior elevated elements (EEEs).
In California, balconies, decks, elevated walkways, and exterior stairs in multi-family buildings often fall under safety and inspection laws such as SB 721 balcony and deck inspections and SB 326 inspections for condos and HOAs.
Repairs to these elements usually require a qualified inspection, code-compliant repair by a licensed contractor, and city permits with final inspections in some cases. If you are not sure whether the wood is structural, treat it as structural and call a professional.
Repair Dry Rot in Wood: Step-by-Step
Step 1: Fix the source of moisture
Dry rot will come back if the moisture problem continues. Before repairing the wood, find and fix the cause. Common sources are:
Leaking roof, balcony, flashing, or window
Clogged gutters that dump water onto wood
Poor balcony or deck waterproofing and drainage
Cracked caulking around joints and penetrations
Typical fixes include clearing gutters, improving drainage, re-sealing joints, repairing waterproofing membranes, or re-directing downspouts.
Step 2: Inspect and mark all affected wood
Do a careful inspection so you do not miss hidden damage:
Probe the wood with a screwdriver or awl.
Mark all soft or crumbling areas, including a little beyond the obvious damage.
Check nearby structural connections, such as where joists connect to walls, posts, or metal hangers.
If probing reveals deep softness in beams, joists, or studs, stop and call a licensed contractor or balcony specialist.
Step 3: Remove damaged wood
For small, non-structural repairs, you plan to patch with epoxy or filler:
Use a chisel, scraper, or oscillating tool to remove all loose, crumbly wood.
Cut or scrape until you reach firm, healthy wood.
Brush or vacuum out all dust and debris from the cavity.
For bigger sections, it may be safer to cut out the entire damaged piece and replace it with new lumber rather than patching.
Step 4: Treat the remaining wood with fungicide and wood hardener
After you clear the rotten material:
Apply a fungicide to the remaining wood and the surrounding area to help kill any remaining spores.
Allow it to soak in and dry fully according to the product instructions.
Apply a wood hardener to strengthen the remaining fibers and improve the bond with epoxy or filler.
This step is essential. Skipping treatment increases the likelihood that the rot will return.
Step 5: Fill and rebuild the area with epoxy or wood filler
Once the wood is dry and treated, you can rebuild the missing section:
Mix a two-part wood epoxy or filler as directed on the package.
Pack the product firmly into the cavity with a putty knife.
Slightly overfill the area so you can sand it back to shape later.
Shape and smooth the surface roughly while it is still workable.
Allow it to cure fully. Some products need 30 minutes, others need overnight.
For larger areas, you can use a combination of:
A wood patch or a new piece of lumber cut to fit
Epoxy to bridge gaps and seal joints
Step 6: Sand, prime, and protect
Once the filler or patch is fully cured:
Sand the area smooth and blend it with the surrounding wood.
Wipe off dust.
Apply an exterior grade primer.
Finish with paint or a protective stain and sealer suitable for your climate.
A good paint or sealer is the final shield that keeps water out and extends the life of your repair.
How to repair Dry Rot In Wood
Dry rot repair tools and materials checklist
You will likely need:
Safety: Gloves, safety glasses, dust mask
Inspection: Flashlight, screwdriver or awl, measuring tape
Removal: Chisel, scraper, oscillating tool or saw, wire brush
Treatment: Fungicide, wood hardener
Repair: Two-part epoxy or exterior wood filler, putty knife
Finishing: Sandpaper, primer, exterior paint or stain, caulk, and caulk gun
When should you replace wood instead of repairing it?
You should replace wood instead of patching it when:
The rot affects a structural part like joists, beams, posts, stair stringers, or balcony ledgers.
The damage covers a large area or goes deep into the board.
The same spot has been “repaired” before and keeps failing.
The fungus has spread into multiple connected members.
In those cases, the safer option is to remove all affected wood, treat the surrounding area, and install new, pressure-treated or rot-resistant lumber. A licensed contractor can also make sure the repair meets local building codes.
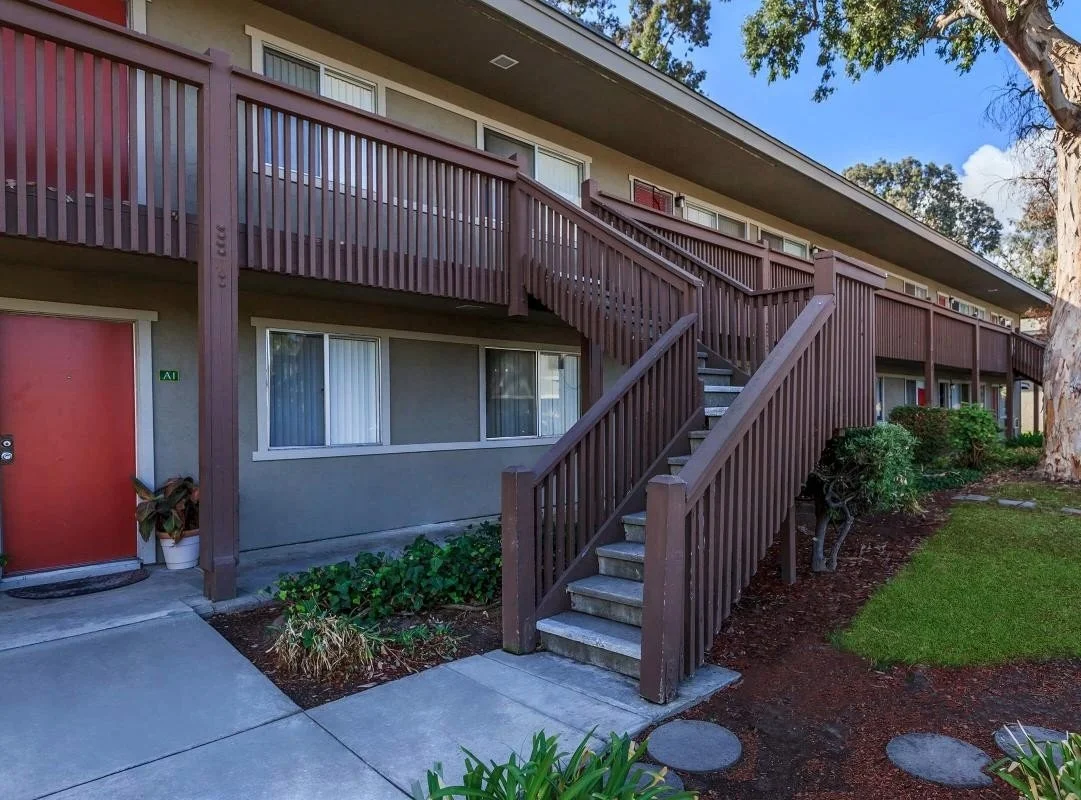
Why dry rot repair is critical for California balconies and decks
For California property owners, dry rot is not only a maintenance issue but also a safety and compliance concern. Balcony and deck failures in the state have led to strict inspection requirements for multi-family buildings and HOAs, especially where exterior elevated elements are involved.
Ignoring dry rot can lead to:
Structural failure of balconies, decks, or stairs
Liability if someone is injured
Costly emergency repairs instead of planned work
Inspection failures and required corrective work under local laws
Regular inspections, early repairs, and proper waterproofing are the best ways to stay safe and avoid surprise costs.
How Great Escape Service & Inspections can help you meet compliance
If you see dry rot on your balcony, deck, exterior stairs, or walkways, it often means moisture is reaching the structural wood that keeps people safe.
Great Escape Service & Inspection can:
Inspect balconies, decks, and other exterior elevated elements for dry rot and related damage
Document findings with photos and clear reports you can share with your HOA, city, or board
Help you understand what is urgent, what is code-related, and what can be planned as maintenance
Coordinate with licensed contractors for repairs and any required re-inspection
Instead of guessing how serious the dry rot is, you get a clear plan for repair and compliance.
Conclusion
Dry rot in wood is more than a cosmetic problem. It is a sign that moisture and fungus are attacking the building's structure. Small, non-structural areas can often be repaired with careful DIY work, but balconies, decks, exterior stairs, and other elevated elements should always be taken seriously.
By fixing moisture issues early, removing all damaged wood, treating the area, and sealing the surface, you can extend the life of your wood and avoid surprise failures. If you are unsure how serious the damage is, contacting Great Escape Service & Inspection is the safest way to get a clear, code-aware repair plan.
People also ask (FAQs):
Can I repair dry rot myself?
You can repair small, non-structural dry rot areas yourself, such as window trim or a small section of siding, as long as you remove all loose material, treat the wood, and use a good epoxy or wood filler. For balconies, decks, joists, or stairs, it is safer to hire a licensed professional.
Do I have to remove all of the dry rot?
Yes. Any wood that is soft, crumbly, or clearly affected by the fungus should be removed. Leaving decayed wood in place allows the fungus to stay active and spread into nearby members.
What is the best treatment for dry rot in wood?
The best treatment is a combination of steps: fix the moisture source, remove damaged wood, treat the remaining area with a fungicide and wood hardener, and then rebuild with epoxy or new wood. No single chemical works if the moisture problem remains.
How do I stop dry rot from spreading?
Stop the spread by drying out the area, fixing leaks or drainage issues, cutting out all decayed wood, and treating the surrounding surfaces. Sealing and painting the repaired area also helps keep future moisture out.
Is dry rot in wood serious?
Yes. Dry rot weakens the internal structure of wood. In balconies, decks, and stairs, which can lead to loose railings, sagging platforms, or even structural failure if ignored.
Can dry rot spread to other parts of my house?
Dry rot can spread through connected wood if the conditions are right, especially where moisture, darkness, and poor ventilation are present. That is why it is important to check nearby framing, beams, and connections, not just the obvious spot.
Is it better to repair or replace rotted wood?
For minor, non-structural damage, a proper epoxy repair can work well. For deep damage, repeated problems, or structural members like beams and joists, replacement with new, treated lumber is usually the safer and longer-lasting option.
How long does a dry rot repair last?
A dry rot repair can last many years if the moisture source is fixed, the wood is treated correctly, and the surface is kept sealed and maintained. If the area stays damp, even a good repair can fail early.
What happens if I ignore dry rot?
Ignoring dry rot can lead to ongoing decay, higher repair costs, failed safety inspections, and, in the worst case, structural failure and injury risks, especially on balconies, decks, and exterior stairs.